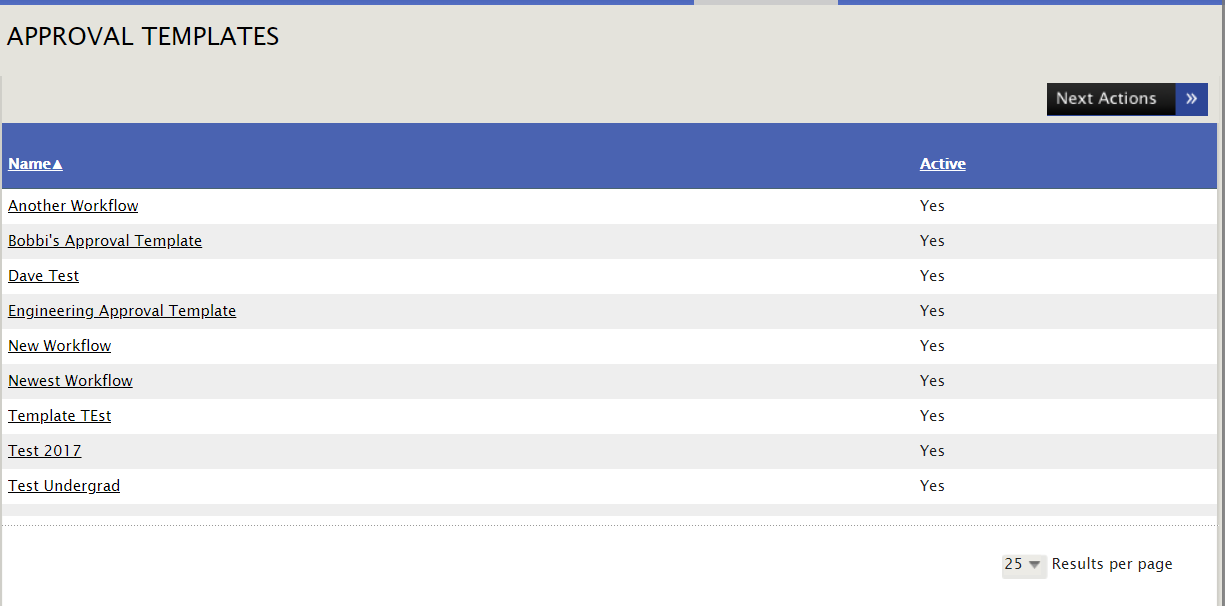
Co-op/Internship Approval Workflow
1. Create Approval Workflow templates – Other Activities > Co-Op/Internship > Approval Templates

2. Next Actions > Add Approval Template
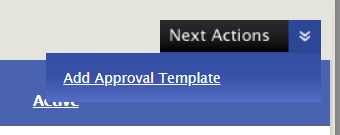
3. Title your template and tag it as “Active” or “Inactive”. Active will allow this template to populate when choosing an Approval Workflow on a Co-Op/Internship record, while Inactive would hide it from this list, but still leave the template available to be tagged as Active in the future.

4. Choose the Approver Types, Steps and Deadline Day count. The Deadline Days field will determine how many days an Approver must complete their step. They will receive a reminder prior to this date as well, letting them know that the deadline is approaching.
a. This screenshot shows all available Approver Types:
- Company Contact – (This is the Company Contact that is linked to the Co-Op/Internship record)
- Company Supervisor – (This is the Company Supervisor listed on the Co-Op/Internship record. This can be the same or different than the Company Contact)
- Advisor – (This is the Advisor selected on the Co-Op/Internship record)
- Primary Co-Op Manager – (This is the Primary Co-Op Manager listed on the Student's profile)
- Secondary Co-Op Manager – (This is the Secondary Co-Op Manager listed on the Student's profile)
- Student – (This is the Student who submitted the Co-Op/Internship record)
- Other – (This is a wildcard type which allows you to input any email address and description of the approver)

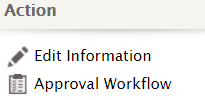
5. On an individual Co-Op/Internship record, you will assign an Approval Workflow Template to be used by selecting Approval Workflow under the Action column.
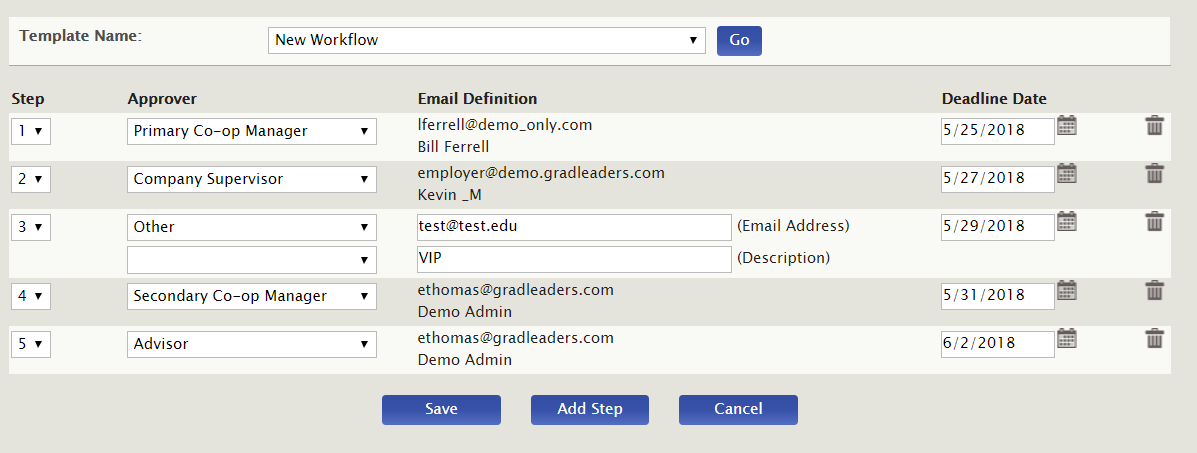
6. You can see that the email information for each Approver Type is automatically generated due to each type being linked to the Student/Co-Op/Internship record. The “Other” type is still an open email field allowing you to input any email address and description necessary.
7. Once you create and save your Approval Workflow on a specific Co-Op/Internship record, you're ready to initiate the process. Click “Initiate Approval Process”
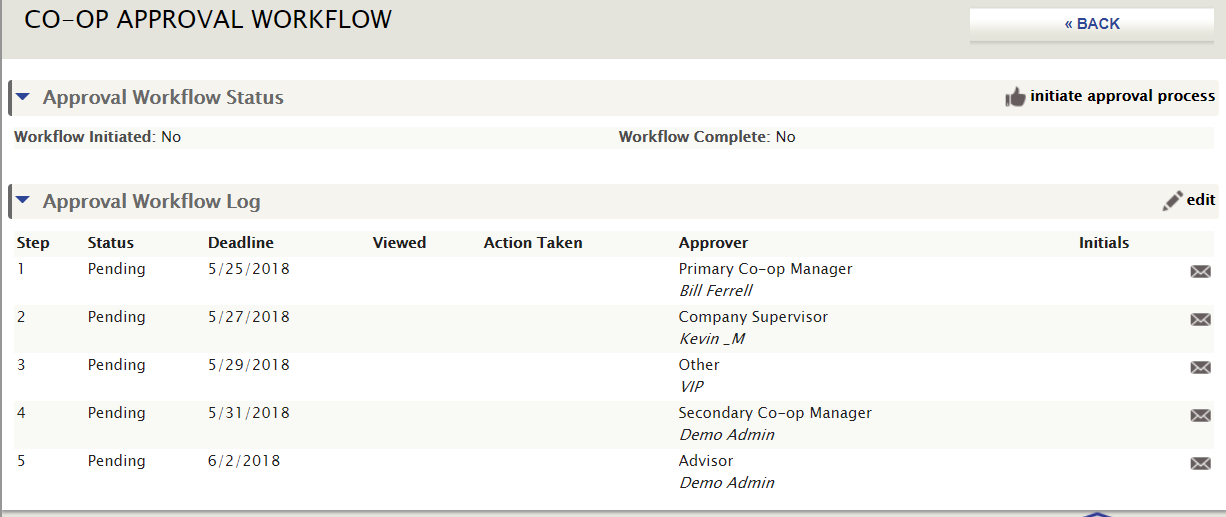
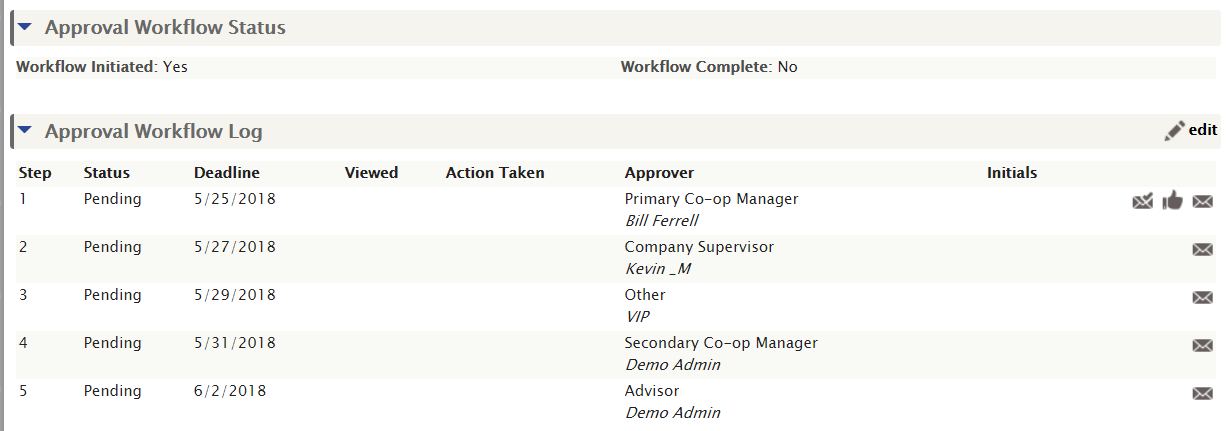
8. You can now see that the first email has been sent to Step 1 of the process. Two new icons are generated: An icon to resend the Approval Notification Email and the other icon allows the Admin to approve or reject on behalf of the user. “Workflow Initiated” has also changed to “Yes”.
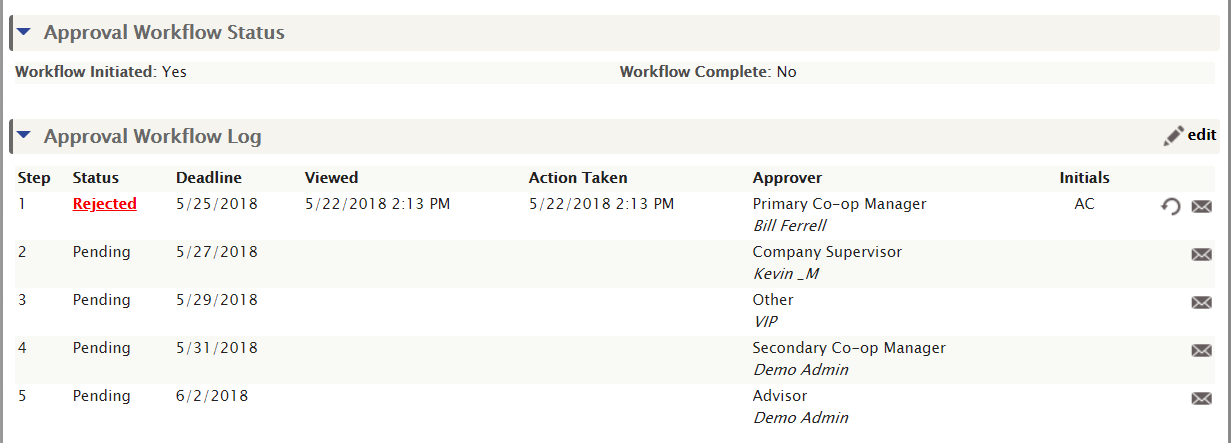
9. If a step is rejected, the Approval Workflow will not proceed to the next step and the Admin will be notified of the rejection via email. The Admin will have the ability to reset the step back to pending so the approver who initially rejected their step can now re-review the form and approve. Reset the status back to pending by clicking on the new icon (reset symbol)
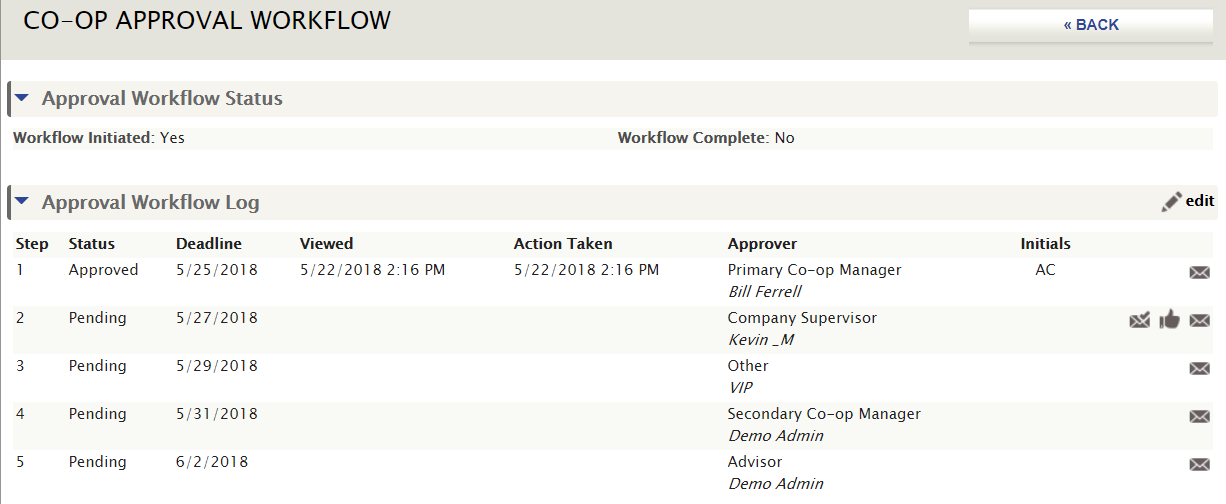
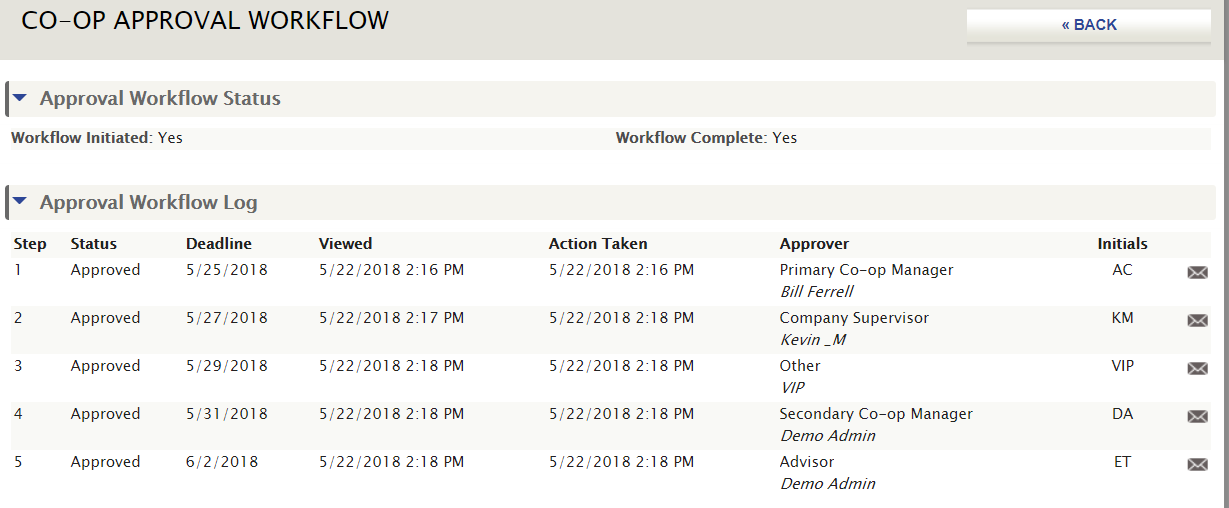
10. If a step is approved, you can see the date that the approver viewed and completed the form. Their initials will also populate. The Approval Workflow will now move onto step 2.
11. Once the Approval Workflow is complete, you can see the details for each approver and “Workflow Complete” will change to “Yes”
FAQ
Q: What can I do if I receive an error when choosing an Approver Type?
A: You may come across this error message when selecting an Approver Type. Here are the solutions based on the Approver Type:
Q: The Approval email was sent to someone who is no longer relevant. How can I resend to another individual?
A: You can find the original email that was sent through the Activity Log. You will search on the Transaction Type – “GENERAL – Standard Single Email”. The original email will include the unique URL that was sent to that Approver. You can then manually send that to the new contact for approval.
Q: Can we send different Approval forms to each different Approver Type?
A: There are 5 different forms we can adjust. They are as follows:
- Candidate = Approver Type: Student
- Admin = Approver Types: Primary/Secondary Co-Op Manager
- Faculty = Approver Type: Advisor
- Employer = Approver Types: Company Contact/Company Supervisor
- Other = Approver Type: Other
Q: Which email templates are related to Approval Workflows?
A: There are 4 email templates related to Approval Workflows:
- Approval Required: This is the template that will be sent to the approver
- Approval Required Reminder: This is the template that will be sent to the approver as a reminder to complete their step (this is based on a setting that controls how many days before the deadline date this email will be triggered and sent)
- Approval Complete: This is the template that will be sent to the Admin when the entire Approval Workflow has been completed
- Step Rejected: This is the template that will be sent to the Admin when a step is rejected by an approver
- When editing the Approval Required and Approval Required Reminder templates, be sure to always include the variable {url} as this will generate the unique URL for each approver.
Article ID: 2324
Created On: May 23, 2018 at 1:22 PM
Last Updated On: Nov 12, 2018 at 11:31 AM
Authored by: Eddie Thomas
Online URL: https://kb.mbafocus.com/article.php?id=2324