Overview - Check-in Kiosk Mode
The Check-in feature is a Web-based application that allows Career Service Offices to quickly and accurately track attendance through GradLeaders Career Center. The Check-In feature has a Kiosk mode where students can check in for advising/coaching appointments, mock interviews, and interviews (OCR). See the article Web-Based Check-In - User Guide for check-in options with events and workshops.
From the Activities menu, select Check-In Kiosk. (Note that the location of this page may have been set up in a different location for your school).
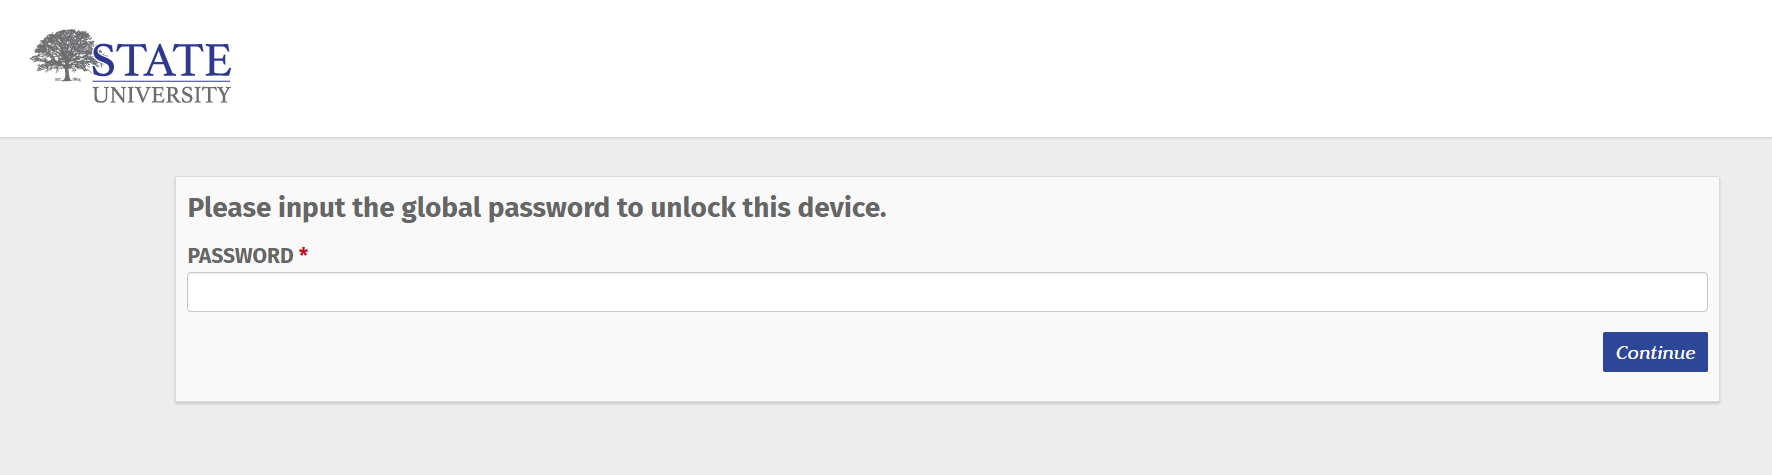
** If this isn't the first time accessing Check-In on this device, click on the lock icon in the top right corner to access settings.
Enter your global password. This can be attained by the main Admin in your office or by contacting support@gradleaders.com.
Click on Continue.
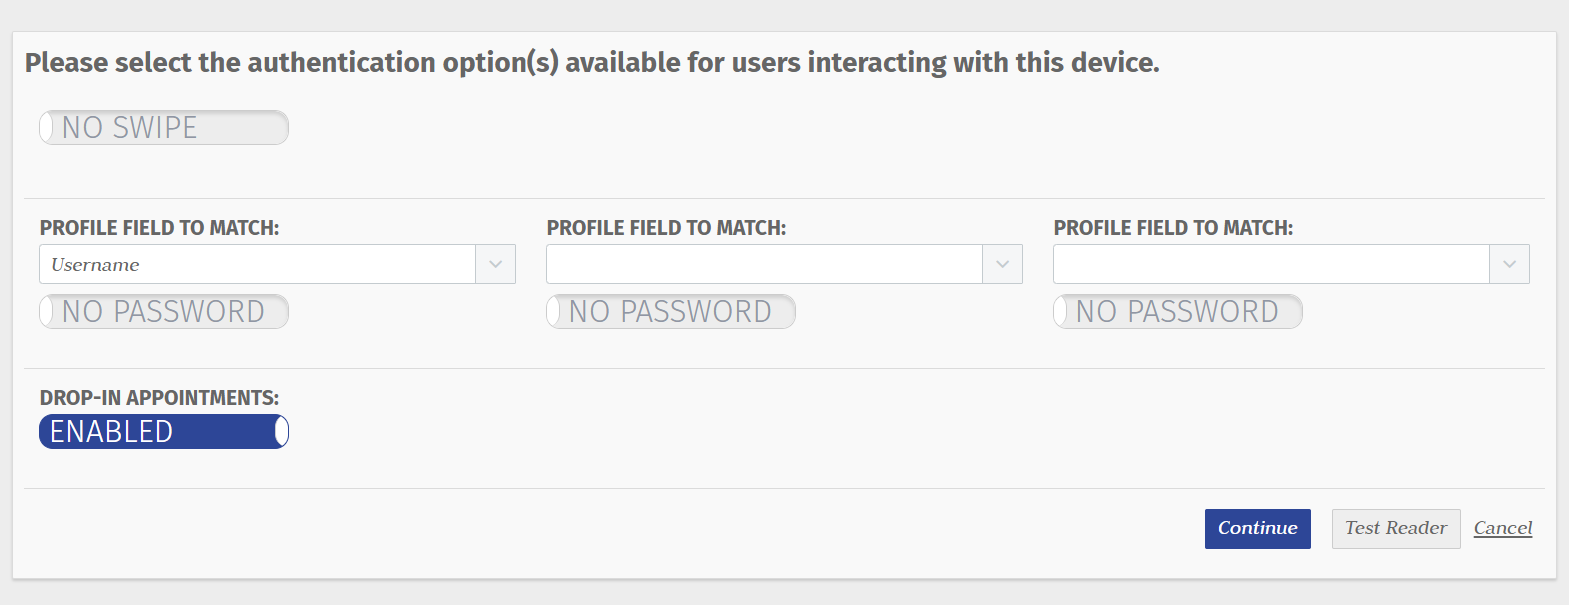
You will then select your necessary Kiosk settings (how you want the students to check-in). See the screenshot below.
After selecting the appropriate Kiosk settings, hit “Continue”. The Check-In program will now be in Kiosk mode. At this point, students can walk up to the machine, swipe their card or manually enter their ID, username or email address.
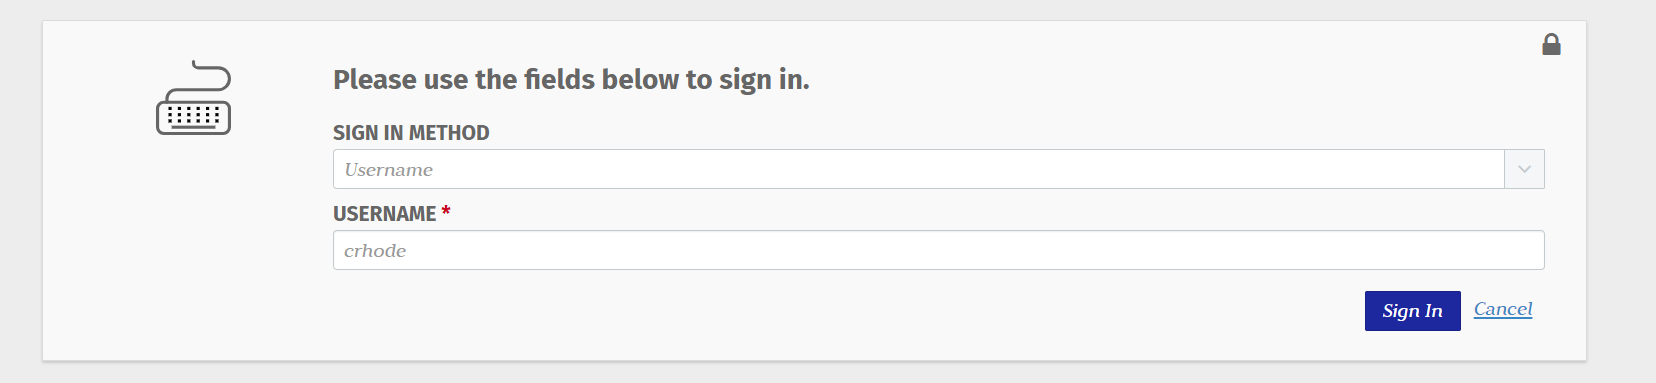
Next enter the username of the student that is checking in. Click on Sign In. NOTE: Click on the lock icon to return to options page.
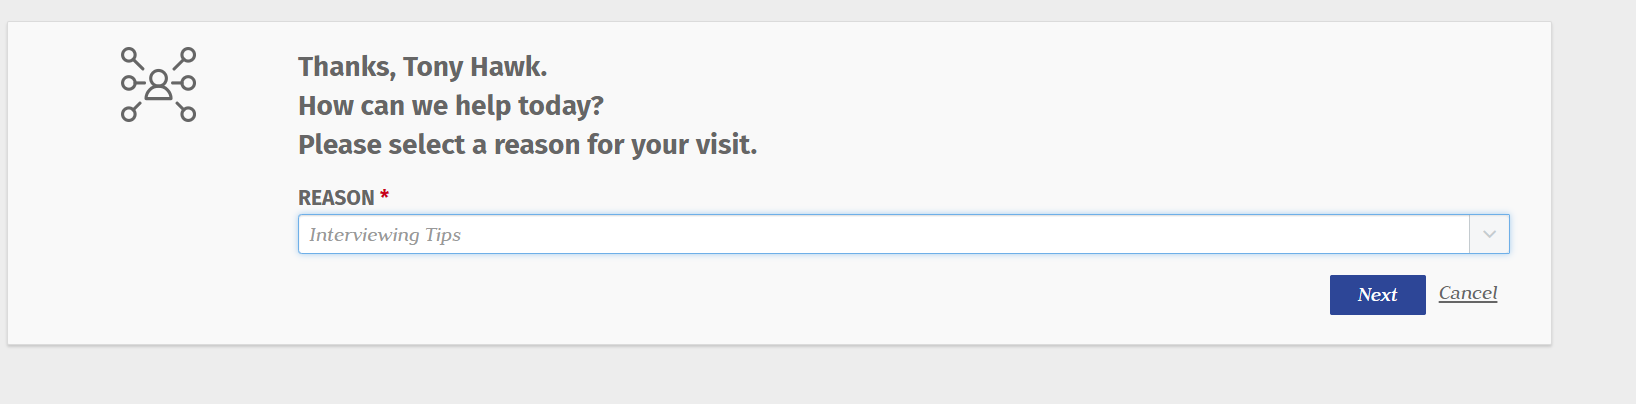
If Drop-In Appointments are enabled, the student will be directed to the next Kiosk screen to select their reason for visiting. See the screenshot below. Note: the list of reasons is customizable. (Continue to next section if for Drop-In Appointments Disabled.)
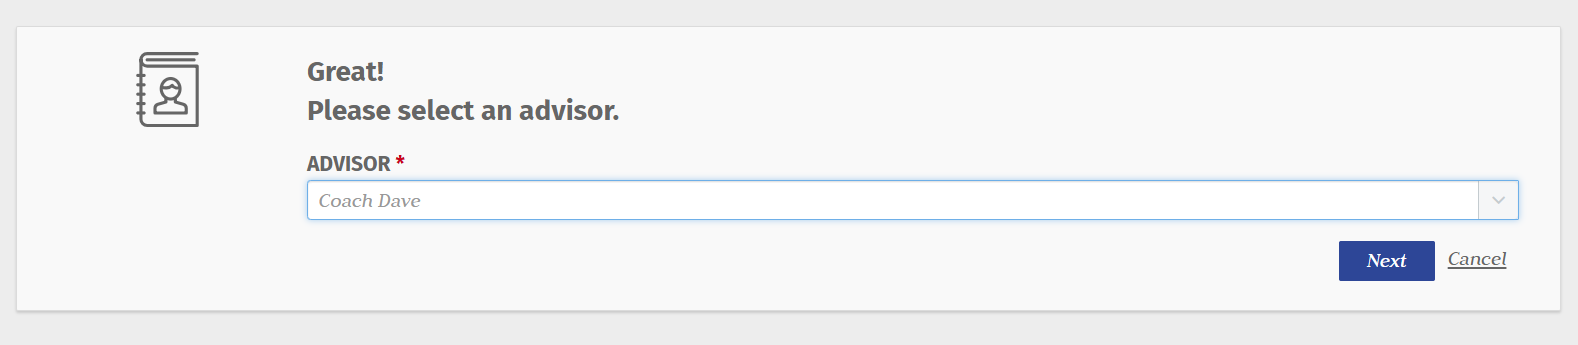
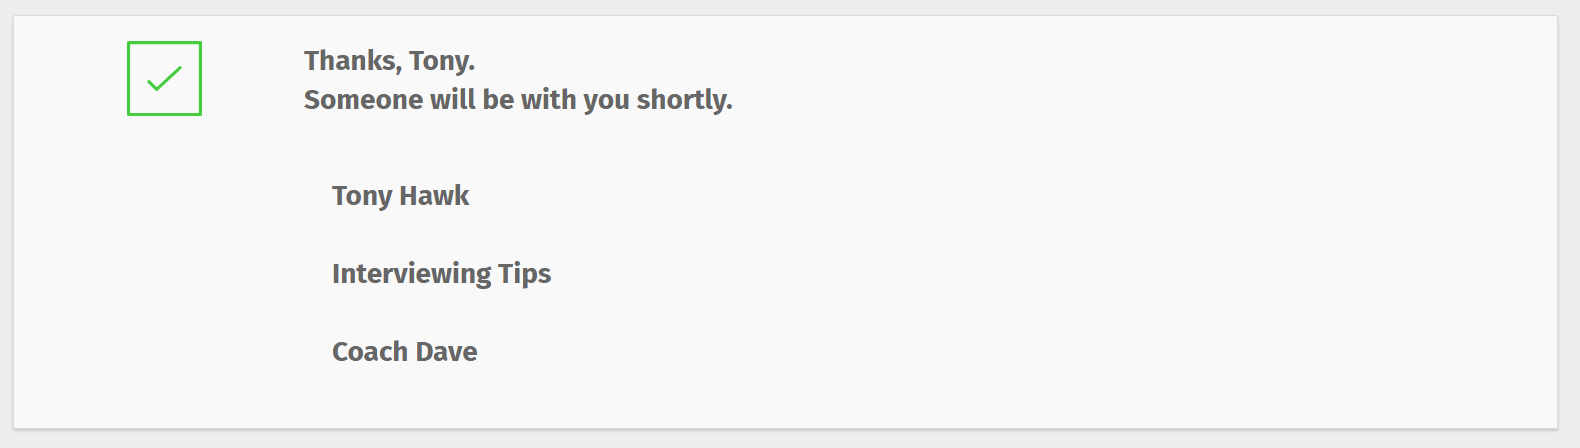
When the correct appointment is selected, click on Next. Once the student has selected the advisor and selected “Next”, they will be redirected to their final confirmation screen which will show their selected reason for visiting and the advisor. See screenshot below.
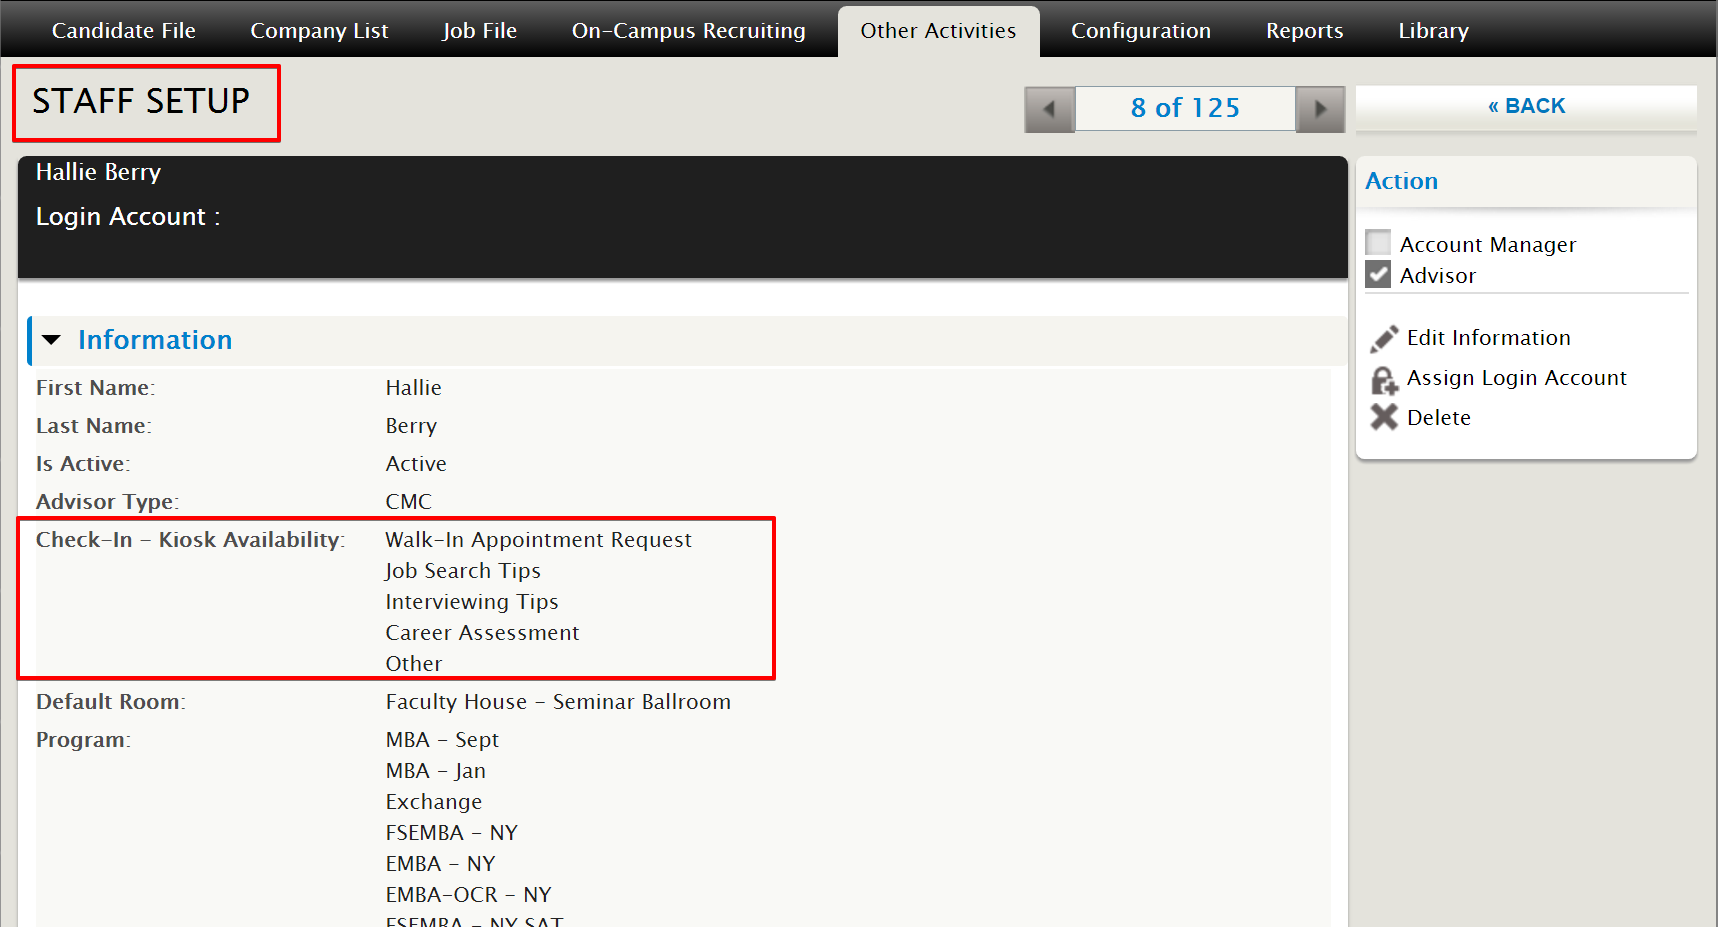
Note: the list of Advisors that populate on the screen above is dependent on the “Check-In Reason” field on the School Staff survey for advisors (question text may be different depending on the school). See screenshot below.
If Drop-In Appointments are Disabled, the student will be will not be able to check-in without an appointment.
If student signs in without an appointment, the message appears:

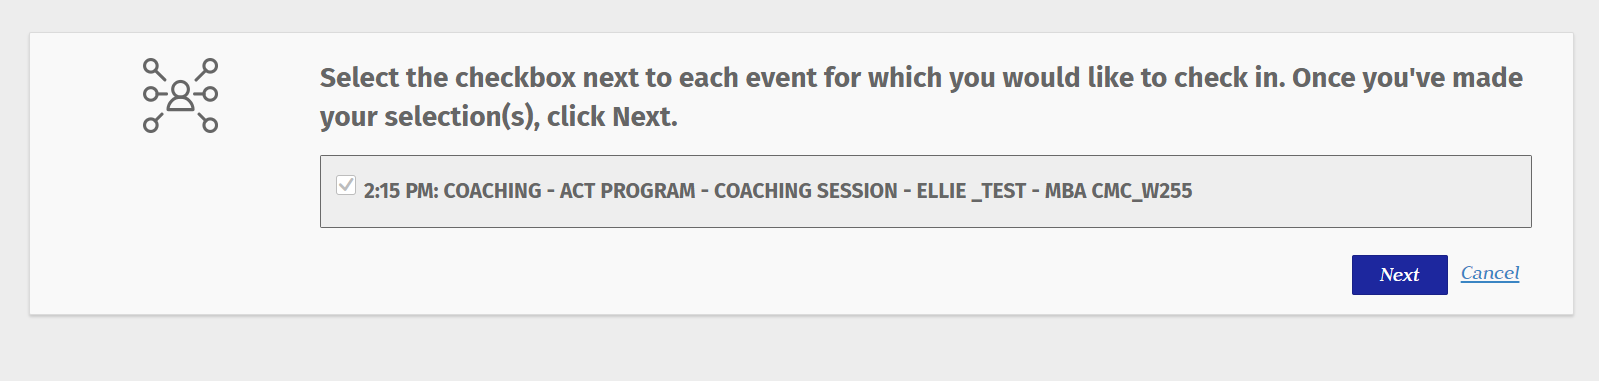
If student has a scheduled appointment, the list of appointments appears. Check off the appropriate appointment.
The Check-In program will send an email to the selected advisor letting them know there is a student waiting for them. If there is no email on file, the email will be sent to the default address set up in Configuration / Check-In tab. (Click on Configuration and then select the Check-In tab). Note: the email that is sent to the advisors can be modified. Email message ID # 297. Email Message Name: “Check-In Notification”.
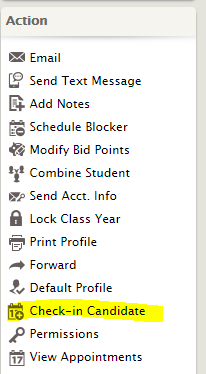
To Manually Check in a Student on the Student Profile
Open the student profile
In the Action panel, click on Check-in Candidate
Check off appointment
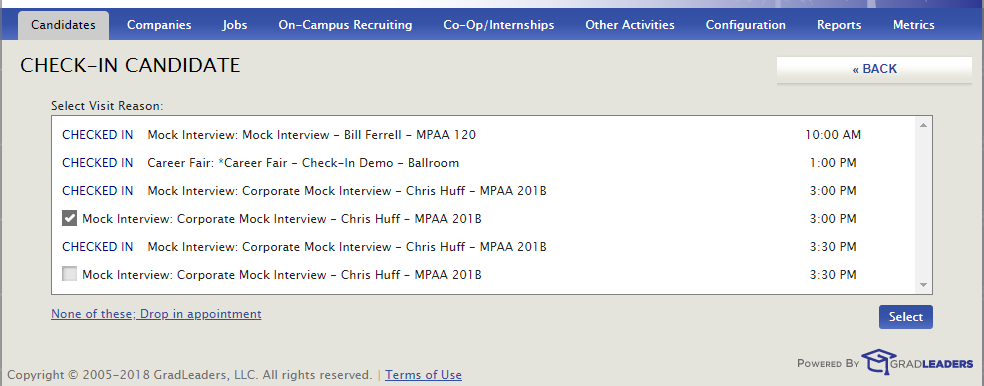
Click on Select
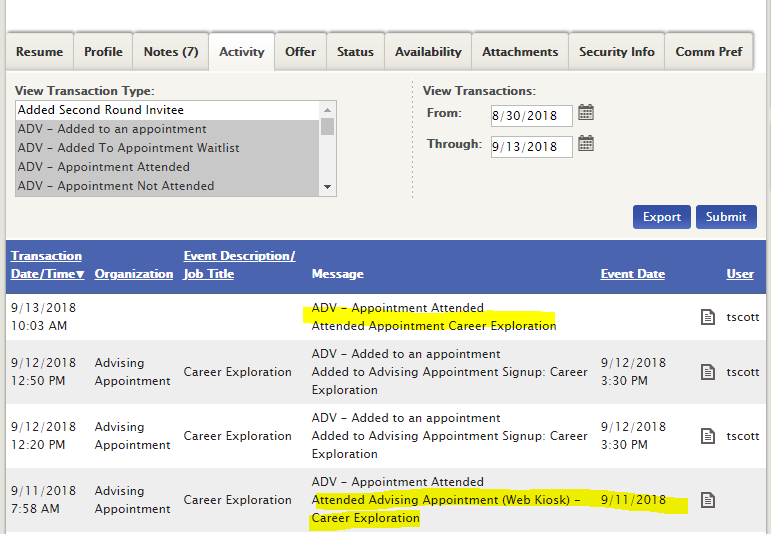
To see a student's check-in or attended activity, click on the Activity tab, select criteria.
Article ID: 3339
Created On: Aug 13, 2018 at 10:52 AM
Last Updated On: Apr 8, 2019 at 2:28 PM
Authored by: Eddie Thomas
Online URL: https://kb.mbafocus.com/article.php?id=3339