Check-In: How to save attendance in Offline Mode
During offline mode, if you encounter a power outage or any disruption to your computer, you can continue tracking attendance and maintain all of your check-in attendance data prior to the disruption. From the Check-In home page, select “Continue In-Progress Activity”, find the Attendance folder and select the necessary .json file and it will load all of the tracked attendance.
Note 1: All attendance files (.json) are automatically saved in real-time after a student has swiped/manually checked in (online or offline).
Note 2: All attendance files (.json) will be named in the same format based on the 4 fields you entered (activityname_activitydate_activitykey).
Note 3: you can also use the attendance file (.json) to continue sign-in at a later time for the same event (online or offline).
Uploading Attendance File into GLCC
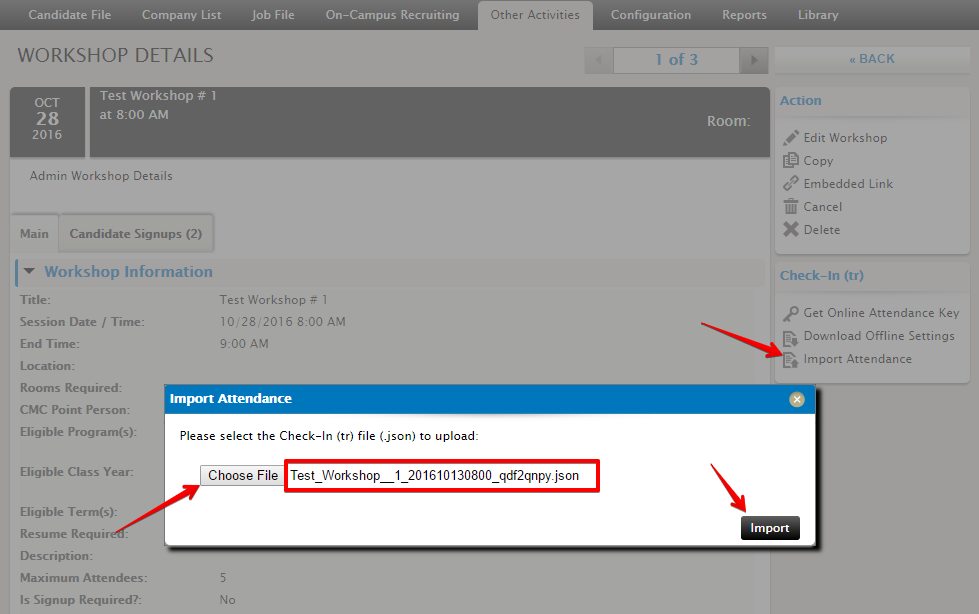
Once the offline event is complete, the attendance file (.json) will need to be uploaded into GLCC in order for each candidate to be marked as “attended” for the event. After saving the attendance file to a location that you will be able to access (i.e. network drive, USB drive, or particular folder on the computer) log into GLCC, select the correct event, and select “Import Attendance” from the Check-In section.
On the pop-up, click “Choose File” to navigate to the location where you saved the attendance file (.json) then click “Open”. The file name will then display next to the button “Choose File”. If the correct file is selected, click “Import”. See attached screenshot below.

The system will then process the attendance file, add the students to the candidate signups tab and mark them as attended. You will receive a confirmation popup of how many students were processed successfully.


 Add Comment