*Completed/Migrated*
Web-Based Check-In – Troubleshooting Guide
Within the Check-In feature, there are a few common errors that you may run into when having students swipe their ID cards. This article will help you identify what those common errors are, what they mean and how to resolve them.
Below is the 1st common error
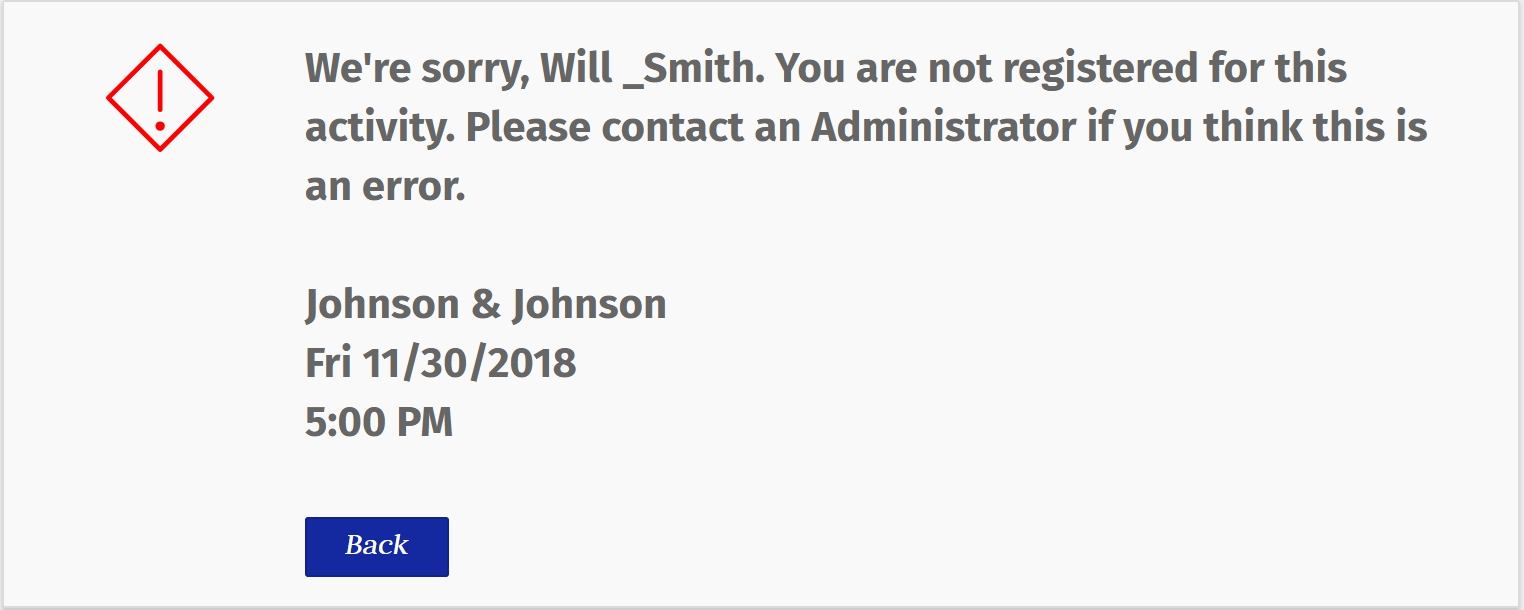
In the error above, you will see that the Check-In program recognized the student and references their name in the error message. The reason for this error is that the student (Will Smith) did not sign up for this event in GLCC before attending. This event does not allow walk-ins.
Below is the 2nd common error
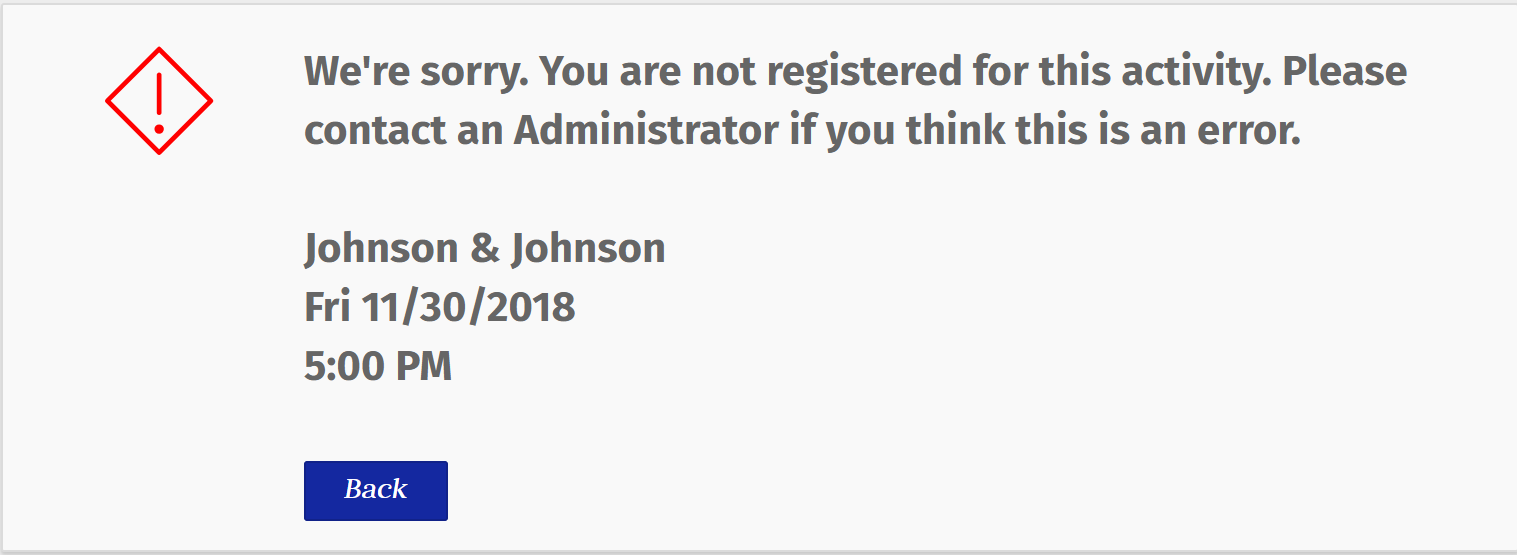
In the error above, note that the Check-In program does not recognize the student and sends a generic error, “You are not registered for this activity” without mentioning the student's name. This means the ID read by the Check-In program, did not find a student with that same ID in our system. There are 3 options of bypassing/resolving this error:
Option 1: If the student did register or you are accepting walk-ins, ask the student to manually enter their email address. This is the quickest way around the generic “You are not registered for this activity” message that does not recognize the student. NOTE: If not set up for email as the Sign In Method, click on the in the top right of the screen, enter the password and select Email as a Profile Field to Match.
Option 2: As an admin, you can manually add the student to the event. (NOTE: To save time during check-in, the student information can be tracked manually. Then follow these steps after the event.)
Exit Check-In. Go to the Event and click on the title. Click on Student Signups tab. Click on Add and find the student. Click on Add Company Event Signup. Click on the icon in the Attended column or ask student to swipe again.
Option 3: (This is the longer approach but it does ensure the student will not have any future issues swiping into events). Click on the to go back to the settings. Enter password. Use the check-in program in Test mode by clicking on Test Reader at the bottom of the page. Swipe the card and review the ID being read by the program.
This will display the ID being read by the Check-In program. Ensure that the same ID is on the student's profile.
Review the student's profile and confirm his “Student Card ID” field (the name of this field might be named differently based on the school). See screenshot below.
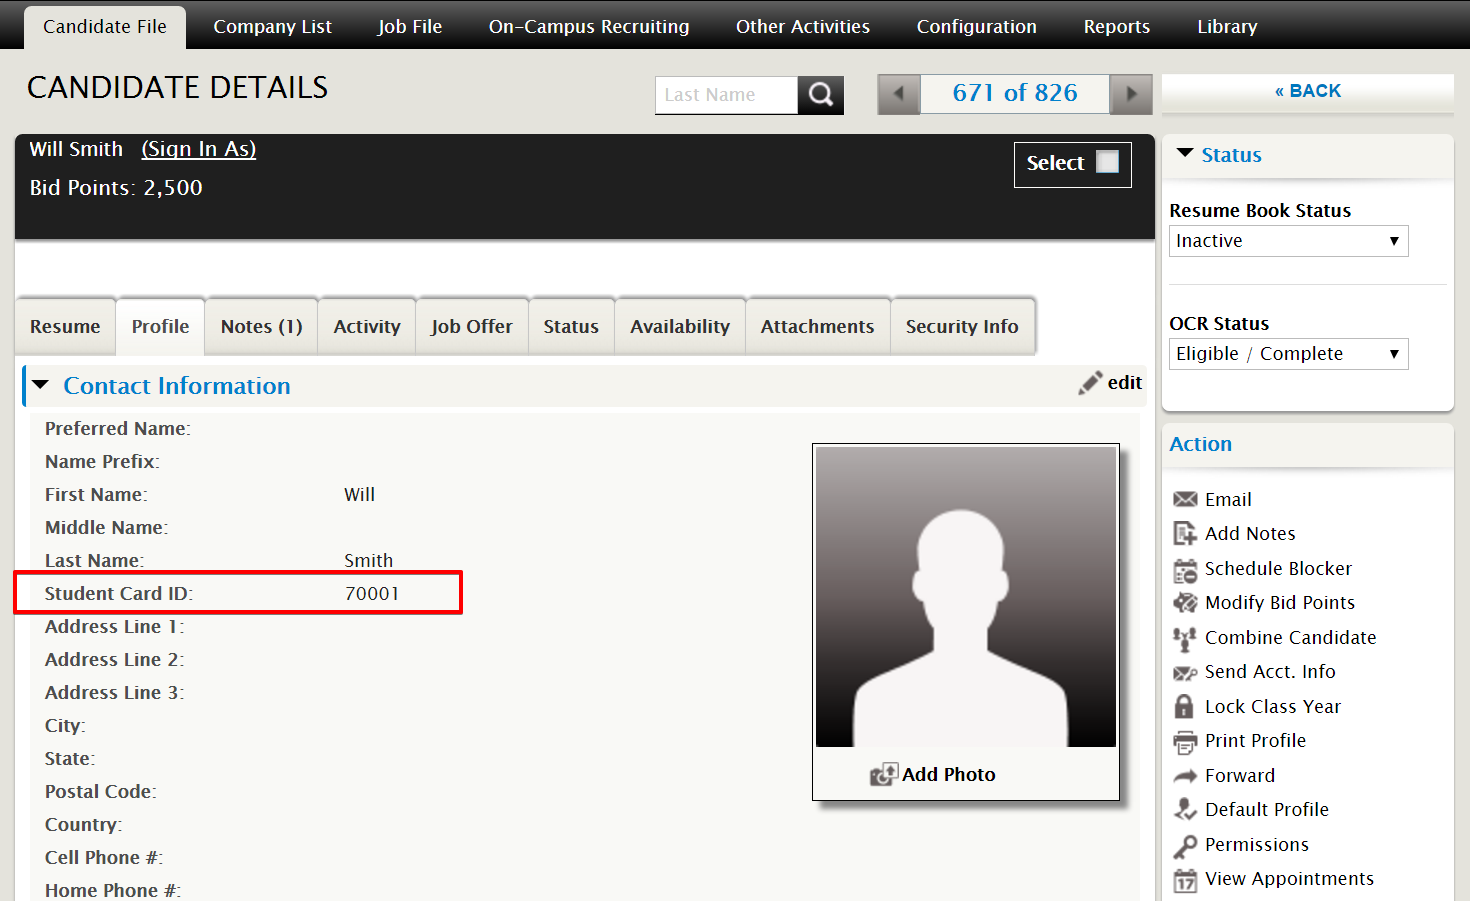
If the “Student Card ID” on the student's profile does not match the numbers being read from the Check-In program, this will be resolved by updating the field on the profile. Once the ID from test mode matches the student profile field, the Check-In program will successfully find the student in all future events.
For any questions or issues regarding the Check-In feature, please send a ticket to support@gradleaders.com or chat with us on LiveChat and provide us with full information regarding the error:
- what is the name of the event?
- Who is the student receiving the error?
- A screenshot of what is the ID being read by the Check-In program in test mode


 Add Comment