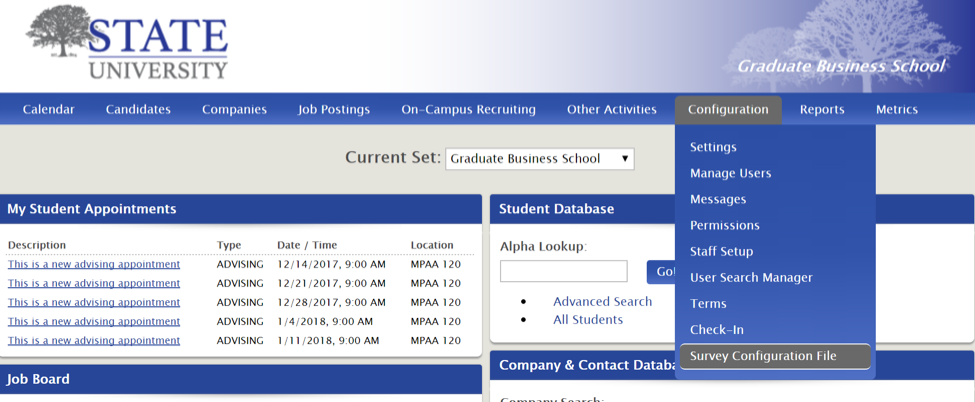
From the main dashboard, go to Configuration>Survey Configuration File.
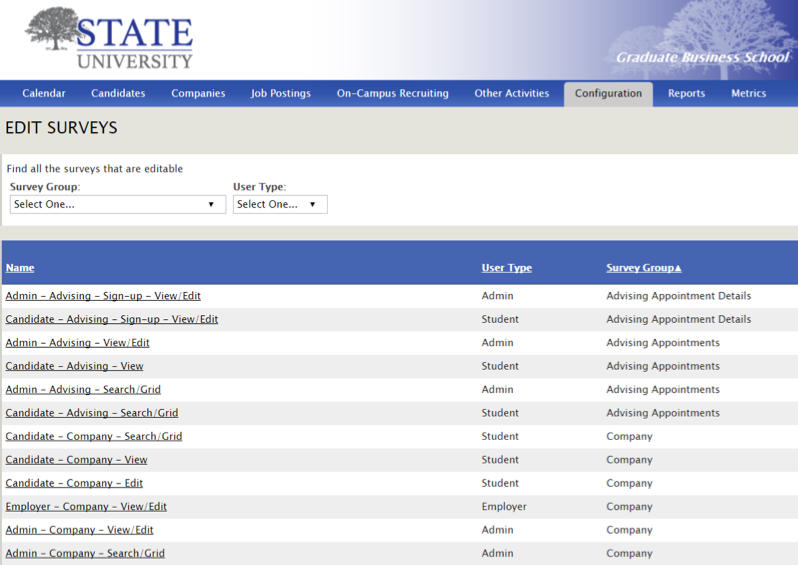
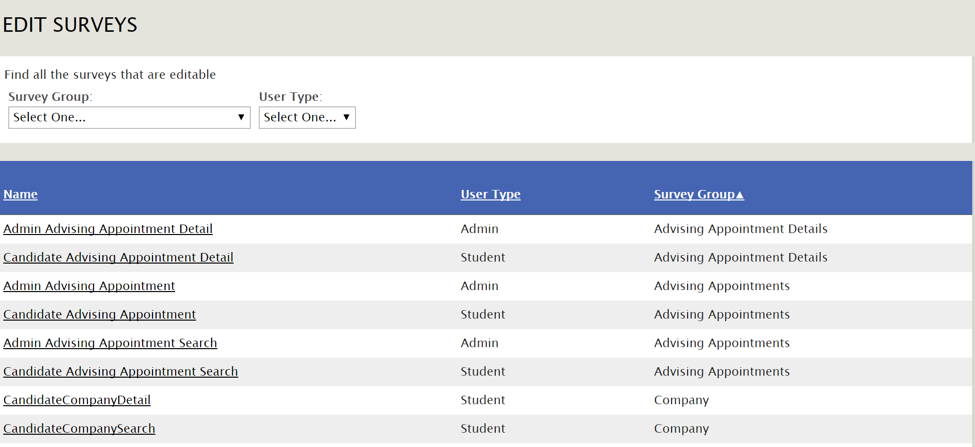
From the Edit Surveys File, you have the ability to manually select the name of the survey (not all surveys are editable) you'd like to edit using the full list, or use the drop-down menu at the top of the screen to filter by survey group or user type.
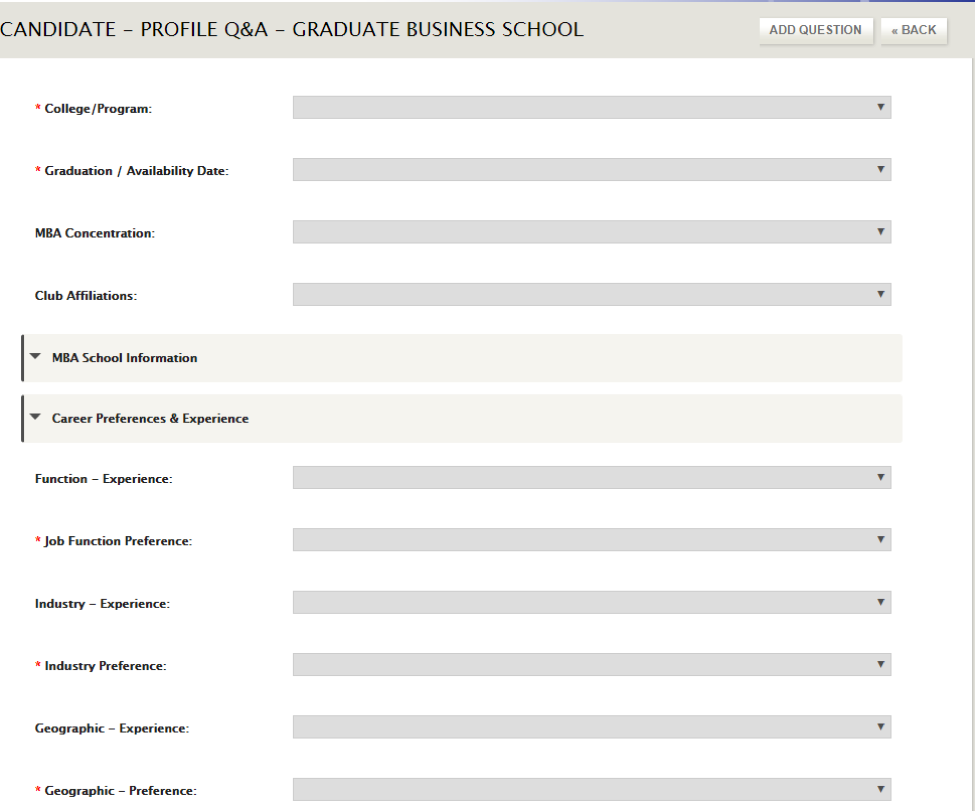
*Note: the term “survey” is really just another word for form. When you edit “surveys,” you're really just editing question and answer forms. It's also important to be aware that you can't add a new survey Contact support@gradleaders.com to do so.
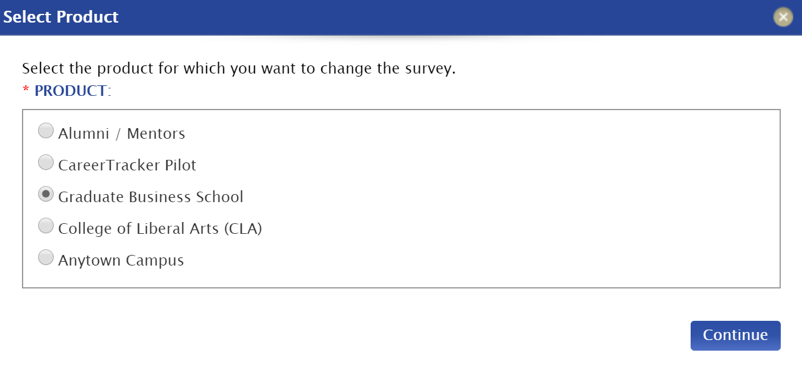
Click the name of the survey you'd like to edit. You may be asked to “Select Product.” (I think this is changing to program) This indicates the PID you're selecting if you have multiple PIDs for your school. Select the appropriate PID if applicable and Continue.
*Note: Each school and program (PID) can have different lists of editable (and non-editable) surveys.
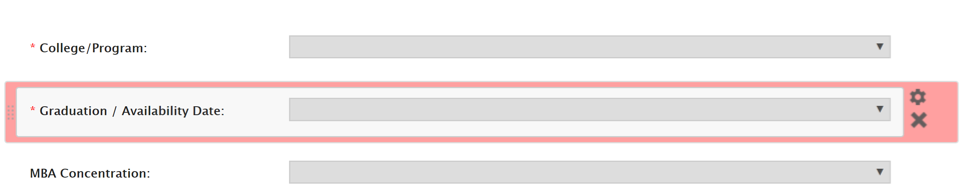
From the detail page, you can adjust the order of questions, add, or remove questions, answers and section headers. When you hover over a question, the gear and X icons indicate if a selection is editable.
To adjust the order of questions, simply drag and drop questions. A red box will appear after you drop a question to its new location, confirming that the change was saved automatically.
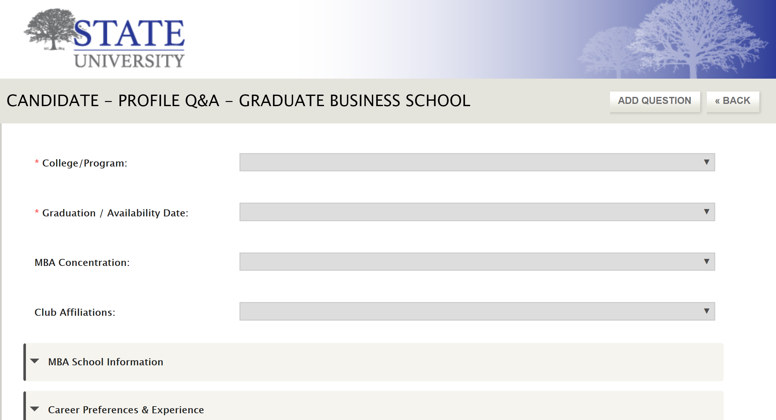
To add a question, click Add Question at the top of your screen.
Determine the question type by selecting either Question or Section Header. Begin typing until the question you're looking for auto-populates, otherwise select Add New Question.
*Note: The system prevents you from adding a question that already exists. If you start to type a question and has already been added, when you click it, you'll only be able to edit that existing question. This helps prevent duplicate data.
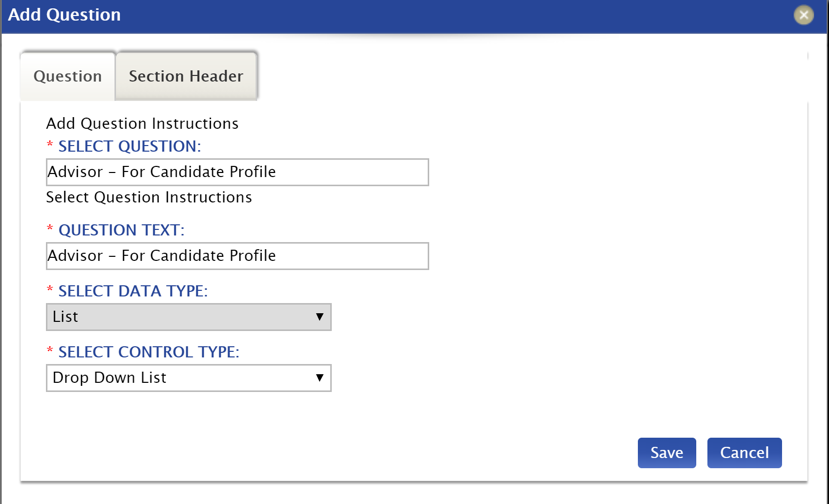
Input additional criteria and Save.
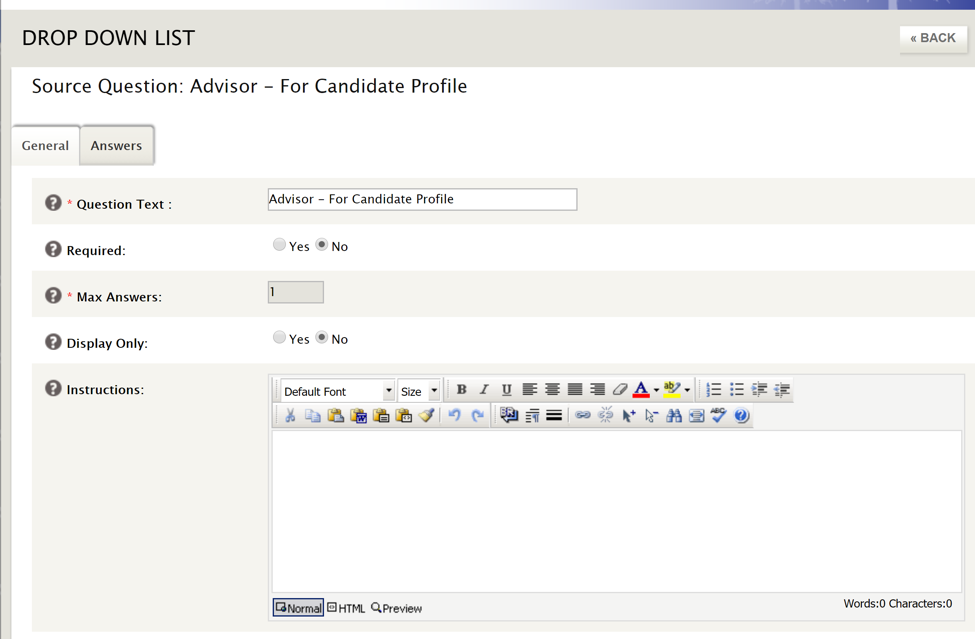
*Note: If a box is grayed out, that means it cannot be edited.
You'll then be prompted to input answers. You can see and edit answers that already exist, or you can sort, add or delete answers.
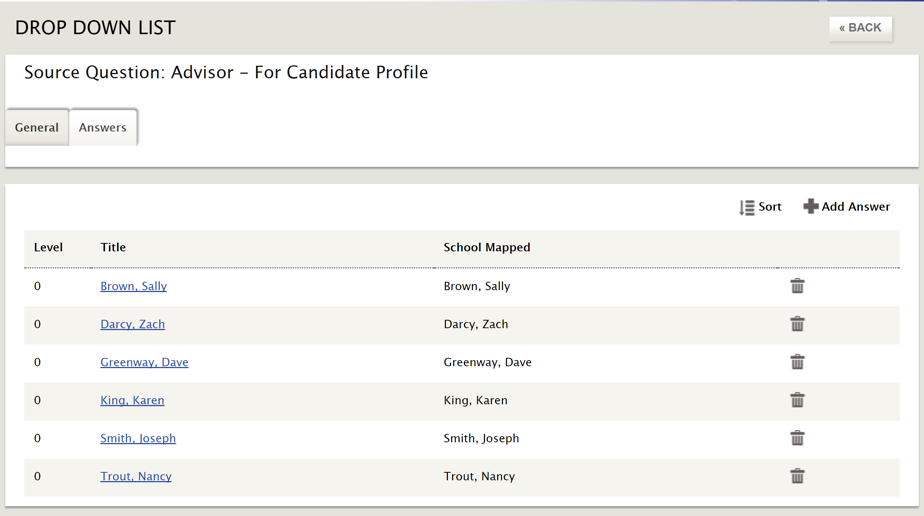
Click the trashcan to delete, or the sort button to change the way answers are displayed to candidates. When sorting, surveys and lists are saved automatically.
To add an answer, click Add Answer at the top, right-hand side of your screen.
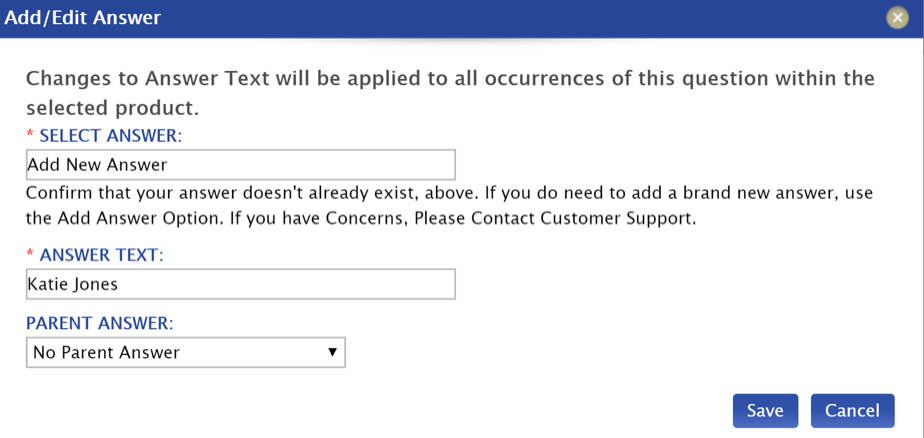
Begin typing until the question you're looking for auto-populates, otherwise select Add New Answer. Input the answer text and the parent answer if applicable, then Save.
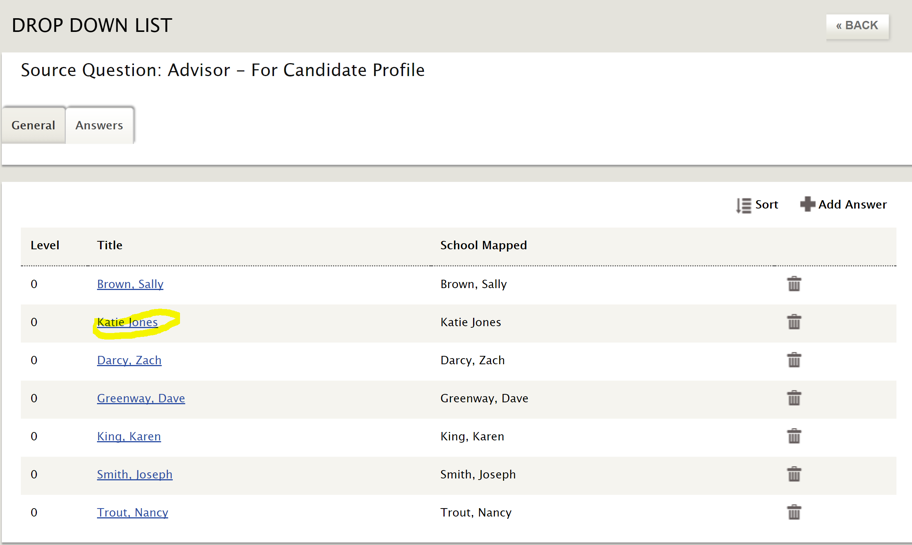
After you save, you'll see your answer on the answer file.
When you click the Back button, you'll see the question you added at the bottom of your screen. Drag and drop to position it where you'd like it to appear.
Then, from the main dashboard, you can sign in as a candidate to view the change, or make additional edits from this view.
Go to Candidates>Candidate File.
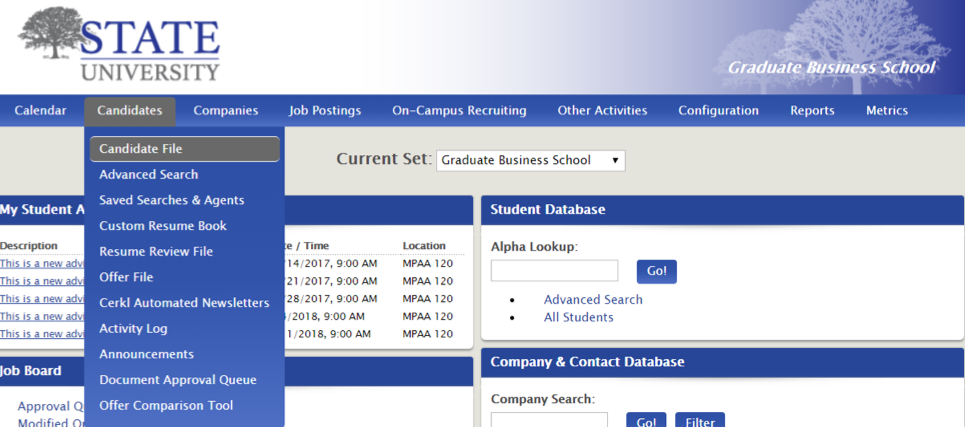
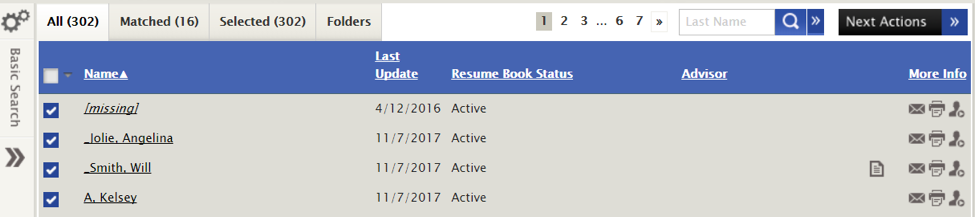
Select any name then click the person icon on the far right to sign in as a student.
When you navigate to the student profile, you can see the edits you've made.
You can also update questions and answers as an admin, when you're signed in as a candidate. Hover over the headers and student profile text. Anywhere you see “edit survey” is editable.
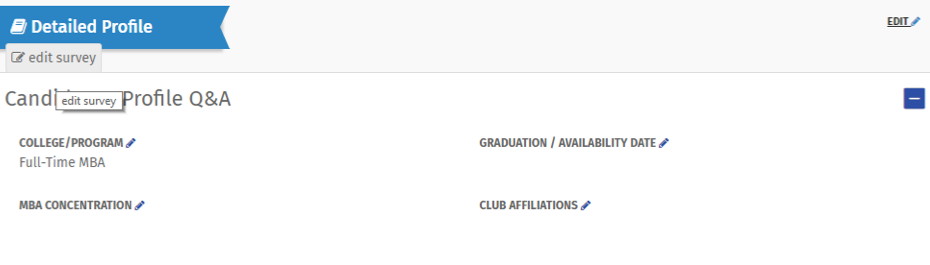
Simply click Edit Survey, and you'll be directed to the page where you can make edits.
As you're exploring these new editing permissions, it's important to note some safe-guards within the system. Only certain surveys are editable to prevent user error that could be detrimental to your daily operations. Some questions can't be deleted, by design. If other questions are deleted by accident, the data is not lost on the backend. You can add the question back and all answers will re-populate.
Deleted answers, on the other hand, will result in a loss of data so be cautious. Our new audit log will enable us to see data changes made and by whom, so we can more effectively provide assistance.
Additionally, make sure all appropriate data has been mapped accordingly so the system can correctly process the “Search by Region” widget on the student dashboard if you're using a Job Board, and for the one-click MBA CSEA Reporting.


 Add Comment